Curious about basement waterproofing systems? Here’s a case study from a job our team in Richmond completed!
How to Waterproof a Basement: Step-by-Step
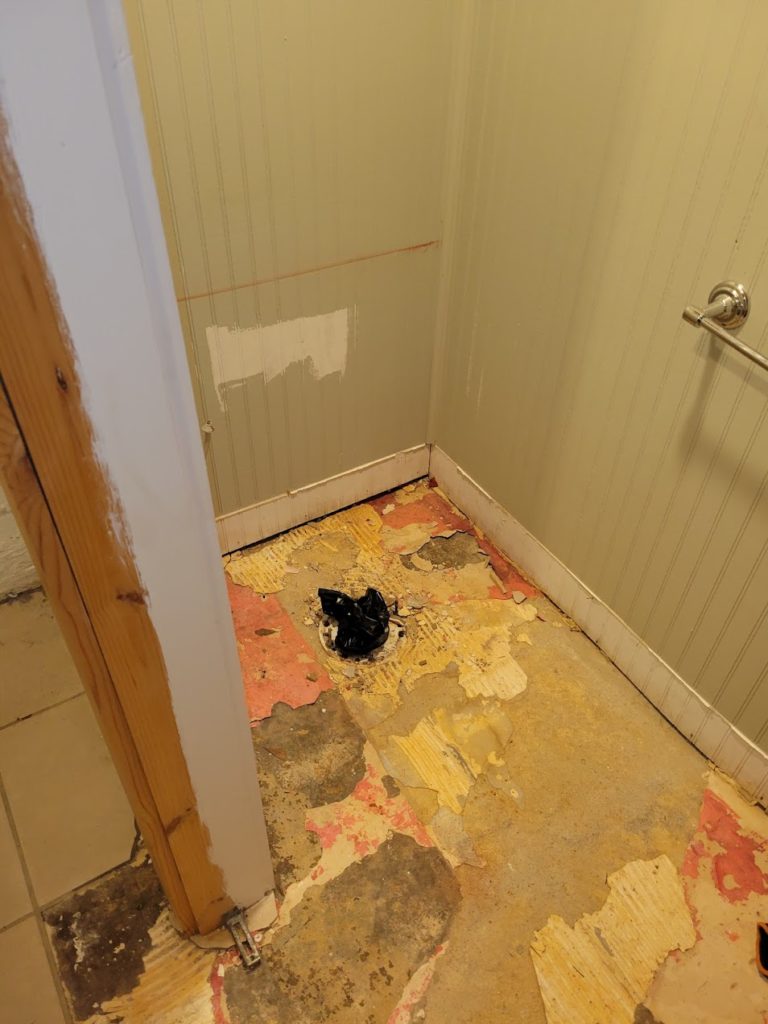
Step 1.
Remove and clear a path along the basement walls for installing the drain system.
Step 2.
Find and mark the location of the sump pump for cutting/breaking through a test area. It’s important to know the thickness and composition of the slab to determine what extra steps might be needed to install a drain system. This also determines where the footer will go and how deep and far out the concrete will need to be removed.
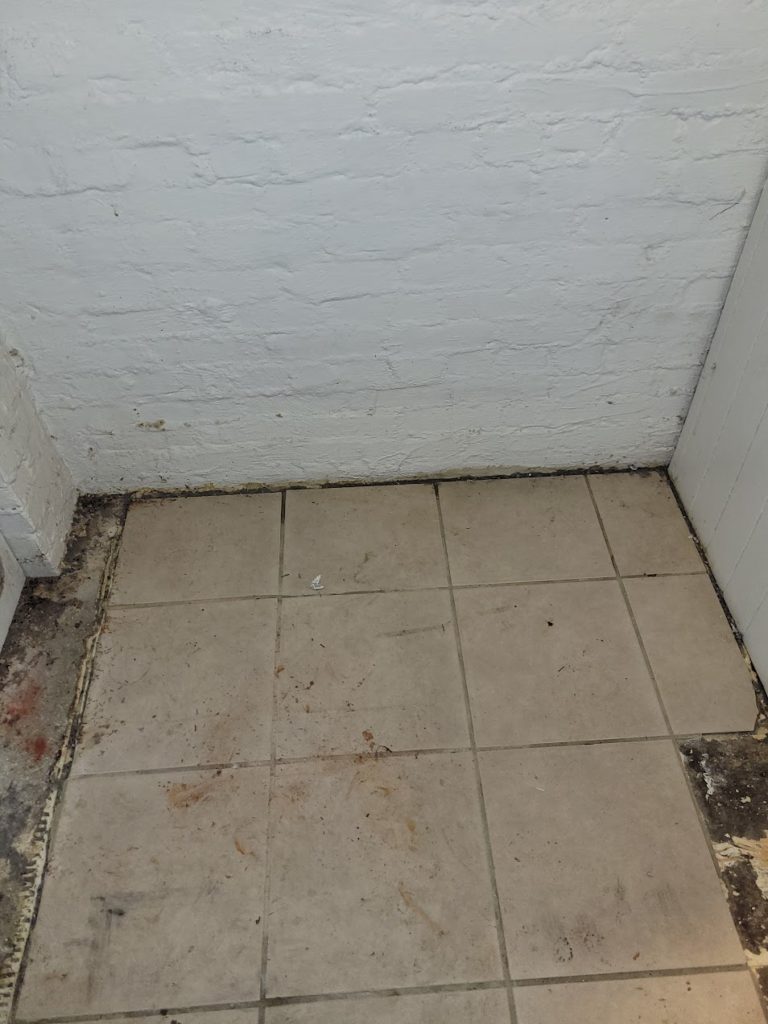
Step 3.
Roughly measure out the area needed to remove slab material to install the basin. Your basin size will be based on the expected water volume it will need to hold. The larger the drain system, the wider and deeper the basin should be.
Step 4.
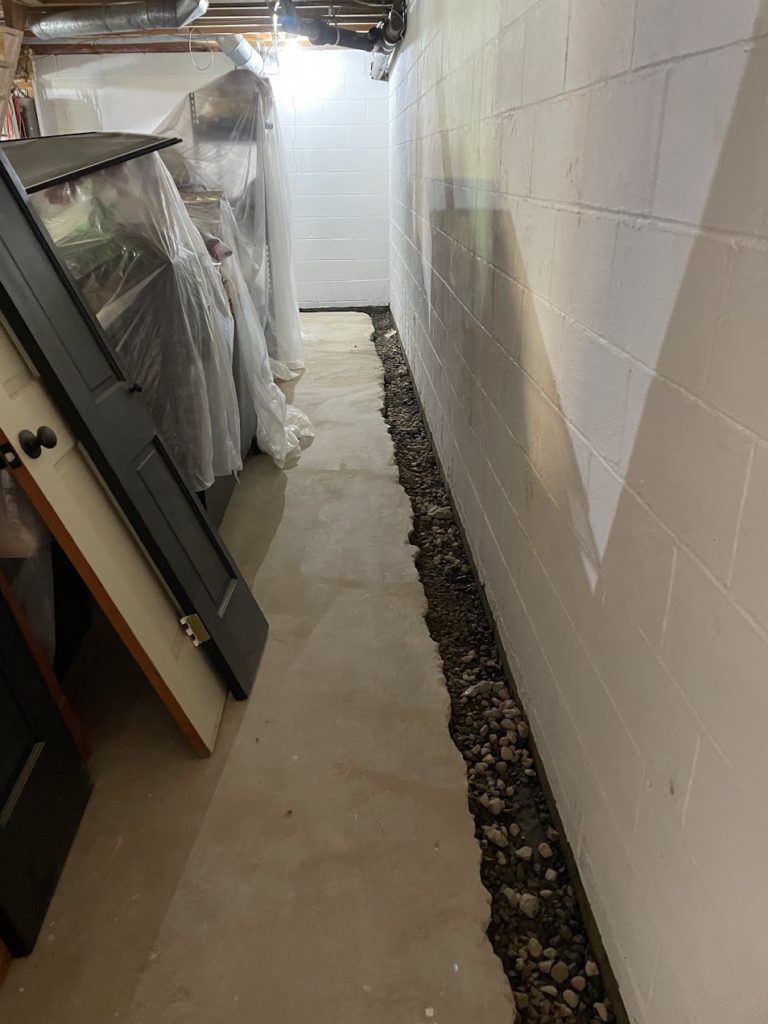
Once the slab has been broken through, begin to work away from the location of the sump pump to break a line of the concrete away from the wall. Snapping a line or using a guide, such as the heel of your boot, can help you track where to break through the concrete, parallel to the foundation walls. Most likely you will have to break out at least 8-12” away from the wall to expose the footer and be able to lay a 4” corrugated pipe or strip drain against it.
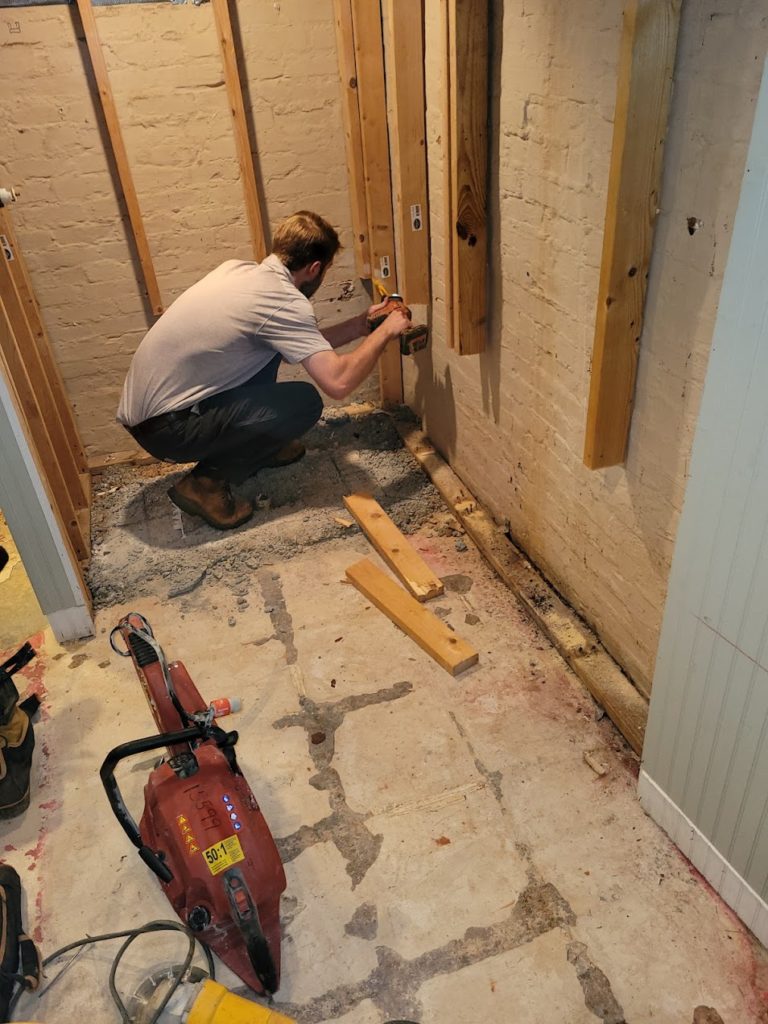
Step 5.
As the person is jackhammering through the concrete along the wall, another crew member will come behind and begin to remove the concrete slab pieces, gravel and dirt underneath it, to get to the footer. Keep doing this until the footer is exposed and at least 4” of dirt has been removed besides the footer. This is the most labor-intensive part of this work as it requires a lot of labor to remove concrete, dirt, and stone from inside the basement to outside the home.
Step 6.
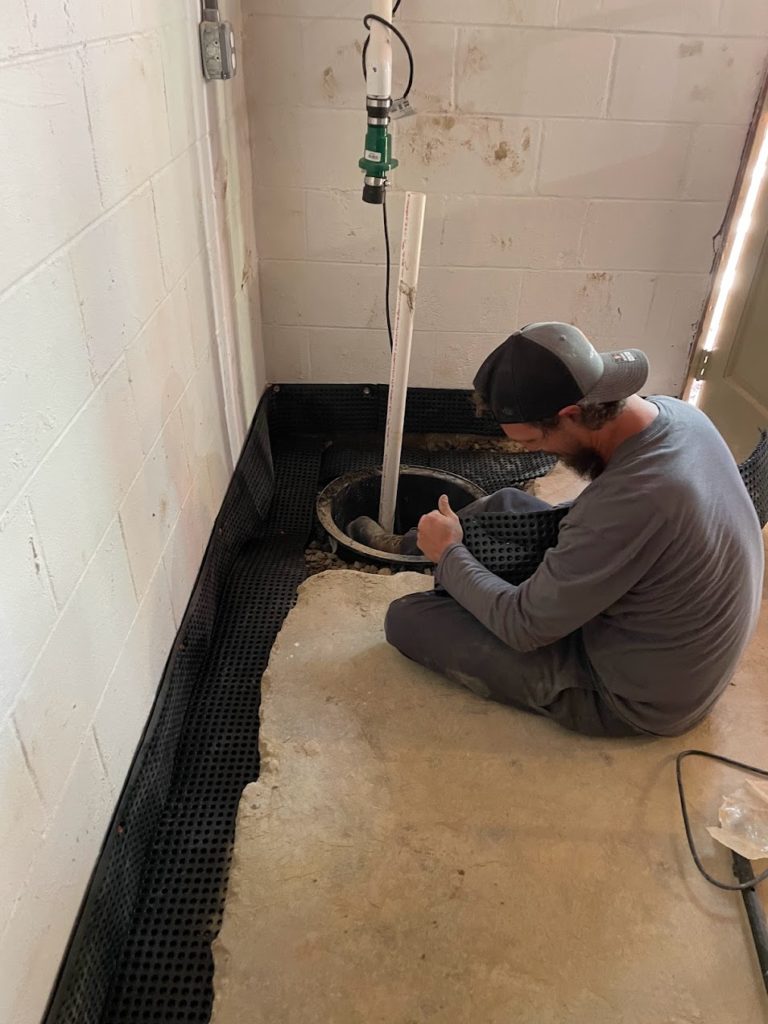
Dig and remove all dirt and stone to install the sump pump basin. Line the area around the basin.
Step 7.
Install the drainage system in the cleaned-out trench and have it pitched and end at the sump pump basin.
Step 8.
Install gravel/filter rock, if necessary, on top of the drainage system and around the sump pump basin. Gravel would be around 1-2” tall, depending on the depth of trench and footer.
Step 9.
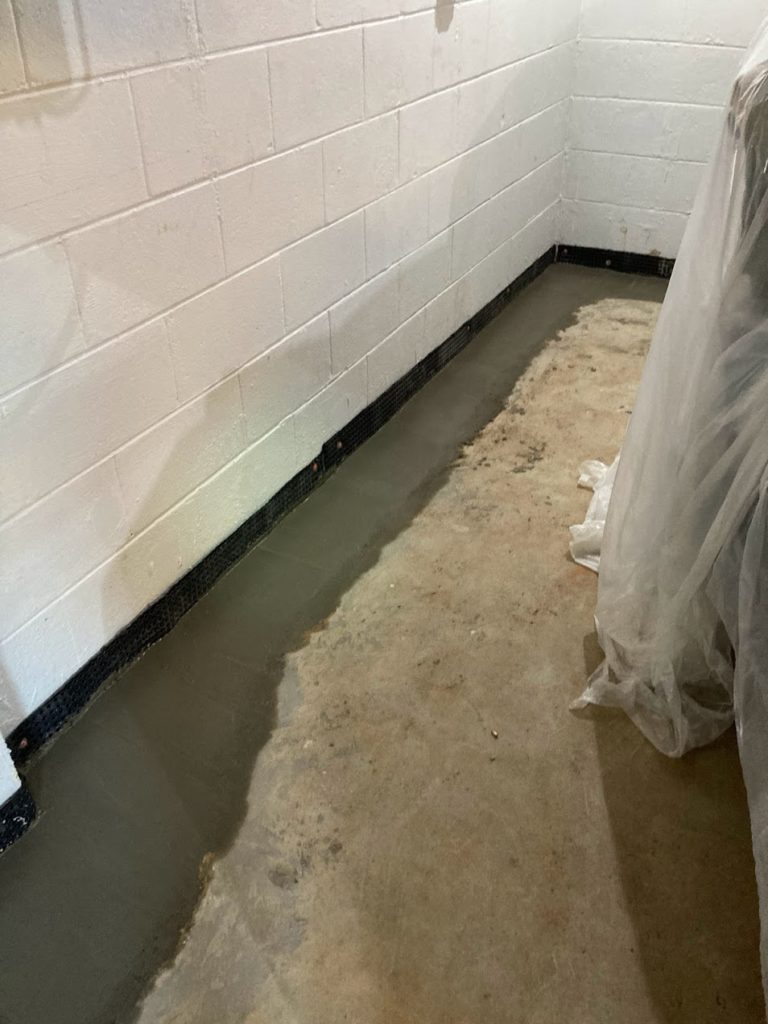
When gravel has been installed, install dimple board or drainage matting on top of the filter rock, and return this up the wall approximately 6”, for a proper air gap. This drainage matting will provide two purposes: (1) when concrete is poured on top of the drain system, it will sit and cure on top of the drainage matting instead of the gravel; (2) it provides the necessary air gap a basement drain system needs for it to ventilate properly and get to the sump pump.
Step 10.
Complete the sump pump installation in the basin by connecting all necessary PVC fittings, with glue and checking the valve, and installing an exiting hole through the home’s foundation wall. PVC should be strapped, as necessary, to the bottom of the joists.
Step 11.
The drainage matting/dimple board will be fully installed and a concrete patch will be poured on top. The concrete will be poured in a single sitting so that it cures as one. The depth of the concrete can be anywhere from 2-4”. If installing framed walls in the future on top of the drainage system, we suggest gluing the pressure-treated bottom plate to the top of the concrete patch.
We Waterproof Basements!
Now you know how to waterproof a basement, it can be a daunting task and isn’t something you should DIY. We provide professional services for basement waterproofing systems. Schedule your free inspection and we’ll come out and assess the situation in your basement and offer solutions at an affordable price!